Nessus for vulnerability scanning
Nessus is a vulnerability scanner that has been around for a while and has a mottled history. It began as an open source scanner, and then Tenable Security took the source code and created a fork of nessus after version 2.0. The 2.0 source is still available, and OpenVAS has taken it and kept it open source.
You can download nessus at http://www.nessus.org for Windows, Mac OS X, Linux, and FreeBSD. You’ll need to register to get a one-time activation code. Nessus is free for home use but not for commercial use, so make sure you get the appropriate license. If you just want to test it out, there is a 15-day license that lets you use the HomeFeed in a commercial setting. Once you’ve downloaded nessus, there are two parts, the server (nessusd) and the GUI interface. The OS X and Windows versions come with the GUI, but if you want the GUI on Linux, you’ll have to download it separately.
Once you’ve downloaded and installed nessusd, you’ll need to register it and start getting plug-in updates. You can use
/opt/nessus/sbin/nessus-fetch --register <your activation code>
on Unix to register your feed. On OS X and Windows, the registration is part of the installation.
The screenshots here are shown in OS X with a slightly older version of the scanning engine because I get annoyed at having to re-register every upgrade, and the updates available in 4.0 aren’t worth it to me. The feeds are the same, so you’re not missing any scans.
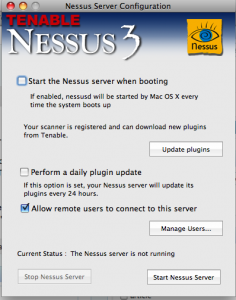
The first thing to do is start the server if you haven’t already. On OS X, this is done through the Nessus Server Manager. On Linux, it’s done with /opt/nessus/sbin/nessusd. However, in all of the .deb files I’ve installed, nessus has installed a script to autostart the server. By default, nessus downloads the latest plug-in feed every 24 hours, but you can force it to download by using nessus-fetch or clicking on “update plug-ins”. If you’re only running nessus once in a while, it makes more sense to just download the feed.

Unless you know what you’re doing, I highly recommend using the GUI for running scans. The GUI allows you to select what nessus server you connect to. This is usually localhost or Local Server, but not always.
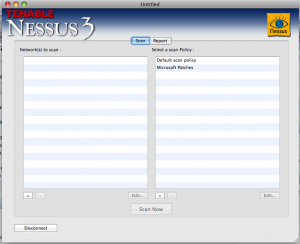
Once you’ve connected to the server, you can set the hosts and IP addresses to scan as well as how to scan them. (I’ve selected localhost because I’m not on a network I’m permitted to scan). The default scan policy is not a bad choice unless you’re looking for something specific on your network. It does not use credentials and has reasonable options for network congestion. If this is your first time, go ahead and select the default scan policy. One of the very important options is “safe checks” – this means that no vulnerabilities will be exploited, the plug-ins will just look for banner information.

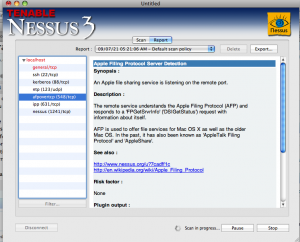
Click on “scan now” and sit back and wait. If you’re scanning a large network, it might take a few hours. The report screen will be updated as the scan continues, so you can get a real-time look at what’s going on. Anything highlighted in red is something that should be looked at.

Next time: how to read those results.
Each Tuesday, Security Musings features a topic to help educate our readers about security. For more information about Gemini Security Solutions’ security education capabilities, contact us!